


14 Adobe Media Encoder & Warping Tunnels
- Jenske Sampson
- May 27, 2021
- 4 min read

Updated: May 29, 2021

LOOK AT WHAT I'VE GOT! After all the hard work and effort I'm reaching a rough 5 minutes of video! I think we reached the 50hours by now. I think I lost count a little bit! Will track it better again!
o continue where we left off (;)) last episode, I will continue explaining some parts of the video that you just saw. BUT... (before we begin) COMPRESSING VIDEO FILES / REDUCE THEIR SEIZE The video has reached a size of more than 1Gb. This means I cannot upload them easily anymore on this blog. I needed to start using Adobe Media Encoder. It was included in my Adobe Cloud License from the university so I should as well. When you upload a file in Encoder you can click on the indication below to change its settings.

This way you can change the format and file size.
You can click it and will get this menu (similar to adobe Premiere)

I mostly choose avi or H,264 as format.
In this case, go for the H.264.
If you then look at the video tab and scroll down, you can adjust the target bitrate and the maximum bitrate. Below you can see the estimated file size: 501 mb
Click on OK.
In Media Encoder you can click the green play button in the right top corner to start to encoding and compress your file.

This helps enormously to reduce file size and make your files manageable for multiple website and Premiere. You can also use it in the beginning of your project in Premiere to size down all your files and reduce the workload for your pc! The video below explains it in more detail:
WARPING TUNNELS To say something more about the video editing of the previous and this video. 1. FLYING ROCKET Did you see the flying rocket in the beginning of the clip? For this sequence I used some new stuff. OOH YEAH
The recipe:
A go(o)d wormhole clip
A clip of a rocket launching
the transform effect for the original wormhole of the beginning
some color change (HLS) effect on hue parameter for the wormhole
Some light blending copies for the rocket
Some glitch images to blend and stitch everything together
Most interesting of all "frame masking"

Now how did I do it more exactly?
First the background:

I took the wormhole clip on the left and used the distortion->transform effect to achieve to texture on the right.
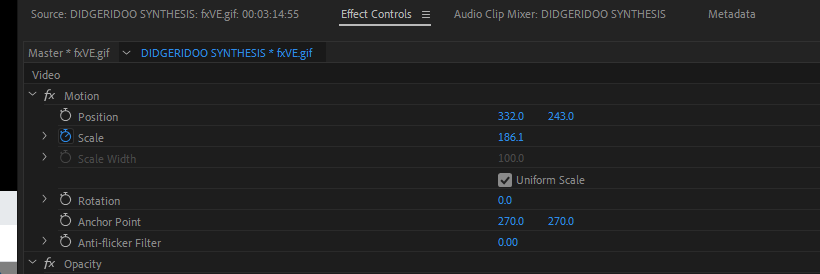
These are the effect settings:

I rotated the picture a little. Increased its size to 150 I changed the hue with color balance (HLS) effect. Then to transform I adjust mainly skew, skew axis and rotation. Feel free to play with other parameters! It feels you can do crazy proper stuff if you learn to use this effect well. BUT we are not there yet! How did I make the rocket ship?
Simple answer masking.
Catch here: You need to do every frame separately. This means that for every second you need to do at least 23-25 frames.
Every frame you have to draw the changes in
Because my computer is slow and does not meet the minimum requirements, it will not assist me in correcting these changes. Skrrr.
Now I get it. Good video editing takes time because some stuff is best done by hand. OMG. 10 seconds means 250 drawings of masks.
OK. I accepted the challenge. Actually, I already tried this out a couple of times, but it kept on failing. After trying with some images, this was the best balance between input and output for the time being. In the future I hope to invest more time in masking though. It is one of the most powerful tools in Premiere I would dare to say.


You know? I could have perfectioned this much more and make this much much much better. But, let's say that we can be happy with it for now, as it illustrated the effect you can achieve! God! I love DIY as Lo-fi for these reasons, I guess!
Finally, add some glitch clips on top. Cut some pieces out of them for some flash ins and outs and you're good to go!
I also added some dust particles from a videoclip heavily zoomed in on low opacity. You can see it in the photos above. If you mix it with the wormhole you can almost not see it, but it adds some extra motion.
In the clip I also add the Schrodinger's cat for that reason! It's amusing, but also adds motion, which in turn makes it less boring (for me at least).
2. WORMHOLE DIVING
Next I want to explain how I made this part of the video around 3.11 First I masked out a circular hole out of a free clip I found. I also kept the edges and with color change (HLS) effect you can choose the color of the edges by toying with the parameters.

I set the size big in the beginning of the frame and let it shrink over time with keyframes. (The scale changes over time from 220 - 32). Once it becomes quite small other layers with a big wormhole already slowly blend in on top of the previous (small) wormhole, so you get a bit the effect of going through different holes after another. With the different backgrounds it gives an impressive look. The trick only works if you start with a wormhole size that is bigger than your canvas size!


Eventually I repeated this process several times.
Each time a new measure begins in the song i put up another background.
after every 2-3 transitions I put some glitch clips and blended them or used opacity to mix them a little bit.
Finally I added the video from the falling astronauts op top of all layers and blended them with the Linear Light blending mode! Sweeeeet!
This is how the timeline could look like:

With the astronauts on top:

layers: top = astronauts falling
little pieces underneath = glitches purple with green indications = wormholes Stair shaped pieces = different backgrounds This was again a loaf of a post. Layers, Layers, Layers, hmmmm... I hope you enjoy me explaining some of the stuff and have learned some more by now. More coming up soon. Smell ya laterz! XOXOXOXO


Comments